Looking for a bright and zesty treat for summer? You’re in the right place! Strawberry lemonade bars are perfect for hot days and fun gatherings. With a simple crust and a tangy filling, these bars are sure to impress. In this post, I’ll share all the ingredients, step-by-step instructions, and tips to make your dessert shine. Let's get started on creating this refreshing summer delight!
Why I Love This Recipe
- Bright and Refreshing Flavor: The combination of strawberries and lemon creates a perfect balance of sweetness and tartness that is incredibly refreshing, especially on warm days.
- Easy to Make: This recipe is straightforward, requiring minimal ingredients and steps, making it perfect for bakers of all skill levels.
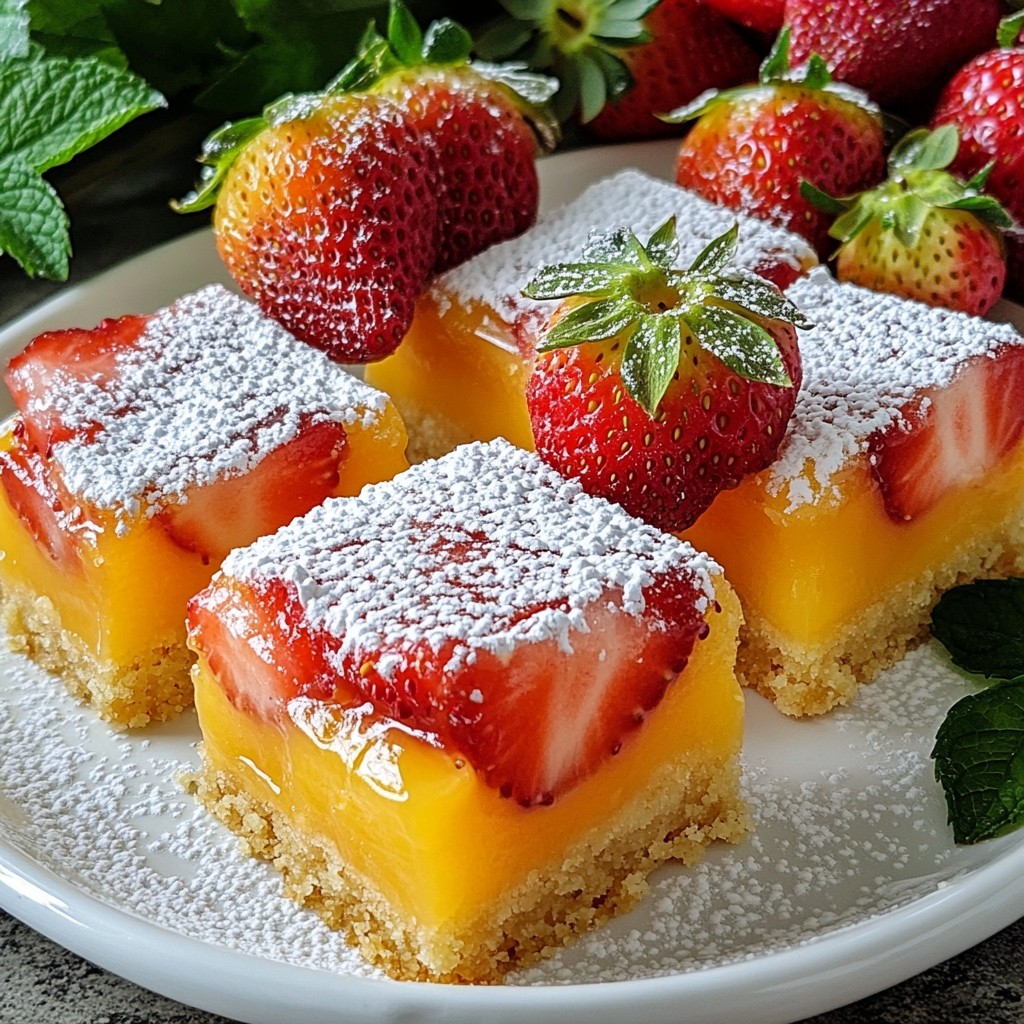
- Beautiful Presentation: The dreamy pink color of the bars, along with the garnishes of fresh strawberries and mint, makes them visually stunning for any gathering.
- Perfectly Creamy Texture: The filling is light and creamy, providing a melt-in-your-mouth experience that pairs beautifully with the crumbly crust.
Ingredients
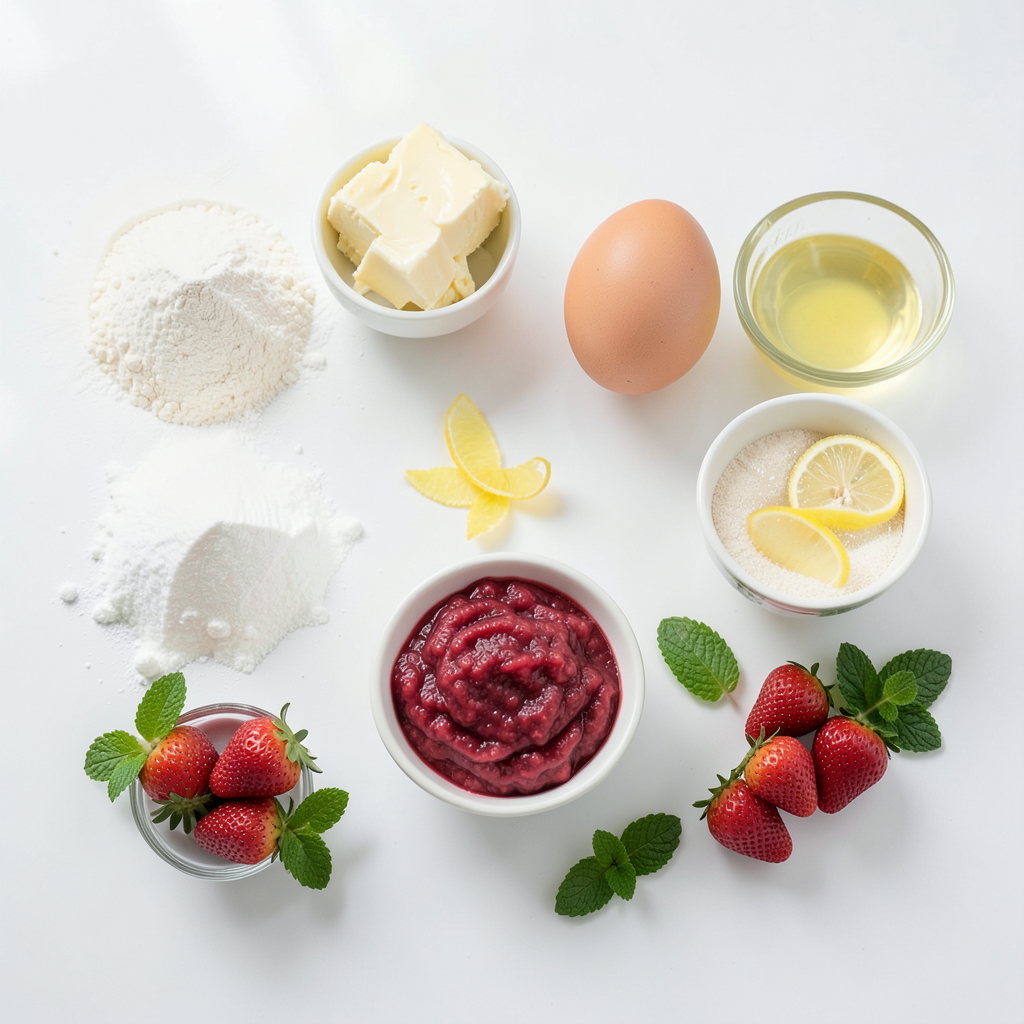
List of Ingredients Needed
- 1 cup all-purpose flour
- 1/2 cup powdered sugar
- 1/2 cup unsalted butter, melted
- 1/4 teaspoon salt
- 3 large eggs
- 1 cup granulated sugar
- 1/4 cup freshly squeezed lemon juice (about 2 medium lemons)
- 1 tablespoon lemon zest (from the same lemons)
- 1 cup fresh strawberries, puréed
- 1/4 teaspoon baking powder
- Fresh strawberries and mint leaves for garnish
Measurement Tips
When measuring flour, scoop it with a spoon into the cup. Avoid packing it down. For butter, melt it and measure in a liquid measuring cup. Use a citrus juicer for lemon juice. It helps get every drop. When zesting lemons, use a fine grater for small pieces.
Substitutions for Key Ingredients
- All-purpose flour can be swapped with gluten-free flour.
- Unsalted butter works best, but you can use coconut oil for a dairy-free option.
- Granulated sugar can be replaced with coconut sugar for a lower glycemic index.
- Fresh strawberries can be replaced with raspberries or blueberries if needed.
- Lemon juice can be replaced with lime juice for a different twist.
Step-by-Step Instructions
Prepping the Oven and Baking Dish
Start by preheating your oven to 350°F (175°C). This will help the bars bake evenly. Next, grab an 8x8 inch baking dish. You can either grease it lightly with butter or line it with parchment paper. Lining the dish makes it easier to remove the bars later.
Preparing the Crust
In a medium mixing bowl, combine the following:
- 1 cup all-purpose flour
- 1/2 cup powdered sugar
- 1/2 cup unsalted butter, melted
- 1/4 teaspoon salt
Mix these ingredients until the texture looks like wet sand. Then, press this mixture firmly into the bottom of your prepared baking dish. Make sure it is even all around.
Making the Filling
In a large bowl, whisk together three large eggs and 1 cup of granulated sugar. Mix until it looks frothy and well-blended. Now, add in 1/4 cup of freshly squeezed lemon juice, 1 tablespoon of lemon zest, and 1 cup of puréed strawberries. Stir until you see a lovely pink color.
Combining and Baking the Bars
Gently fold in 1/4 teaspoon of baking powder. Be careful not to overmix; you want to keep the filling light. Pour this filling over the pre-baked crust, spreading it evenly. Return the dish to the oven and bake for 25 to 30 minutes. The edges should be set, but the center can still jiggle a bit.
Cooling and Serving Suggestions
Once baked, take the bars out and let them cool at room temperature for at least 1 hour. After that, refrigerate for 2 to 3 hours. This helps them set completely. When ready to serve, cut the bars into squares. For a nice touch, dust them lightly with powdered sugar. You can also garnish with fresh strawberries and mint leaves for a bright look. Enjoy your delicious Strawberry Lemonade Bars!
Tips & Tricks
Ensuring Perfectly Set Bars
To get perfectly set bars, follow these steps. First, you need to bake the crust until it is light golden. This helps create a strong base. When you pour the filling over the crust, make sure the filling is well mixed. The eggs in the filling help it to set. After baking, let the bars cool at room temperature for an hour. Then chill them in the fridge for at least two hours. This cooling time helps the bars firm up nicely.
Tricks for Easy Cleanup
Cleanup can be a breeze with a few simple tricks. Start by lining your baking dish with parchment paper. This makes lifting the bars out easy. After you bake the crust, wash the mixing bowl right away. This keeps it from sticking. Use a sharp knife to cut the bars. This makes clean cuts and keeps them looking nice. Wipe down your counters while you bake. It saves time later and keeps your space tidy.
How to Achieve the Best Flavor
For the best flavor, use fresh ingredients. Fresh strawberries add a vibrant taste. Squeeze your own lemon juice for a brighter flavor. The zest from the lemons also adds depth. Don’t skip mixing the filling well. A well-mixed filling ensures even flavor in every bite. You can also add a pinch of salt to enhance sweetness. Finally, dust the bars with powdered sugar before serving. This adds a sweet touch and makes them look pretty!
Pro Tips
- Use Fresh Ingredients: For the best flavor, use fresh strawberries and freshly squeezed lemon juice. This will enhance the taste and give the bars a vibrant color.
- Check for Doneness: The bars are done when the edges are set, and the center still has a slight jiggle. Overbaking can lead to a dry texture, so keep an eye on them.
- Chill for Best Results: Allow the bars to chill in the refrigerator for at least 2-3 hours before serving. This helps the filling set properly and improves the overall texture.
- Garnish with Style: For an elegant presentation, garnish with fresh mint leaves and a dusting of powdered sugar just before serving to make the bars visually appealing.
Variations
Flavor Combinations
You can mix different fruits into these bars. Try using raspberries or blueberries with the strawberries. These berry mixes add a fun twist and vibrant color. You can even use a mix of all three for a berry explosion!
Gluten-Free Options
If you need gluten-free bars, swap the all-purpose flour with almond flour or a gluten-free blend. Make sure the blend has xanthan gum to help the bars hold together. This way, you still get that yummy taste without gluten.
Alternative Sweeteners
If you want to cut down on sugar, use honey or maple syrup instead of granulated sugar. This change gives the bars a unique flavor. You can also try stevia or monk fruit for a low-calorie option. Just remember, these sweeteners can affect the texture a bit, so adjust the amounts as needed.
Storage Info
Best Methods for Storing
To keep your Strawberry Lemonade Bars fresh, store them in an airtight container. Line the container with parchment paper. This helps avoid sticking. Place the bars in a single layer. If you need to stack them, add more parchment paper between layers. This way, they won’t stick together.
Freezing Instructions
You can freeze these bars for later enjoyment. First, let them cool completely. Then, wrap each bar tightly in plastic wrap. Next, place them in a freezer-safe container or bag. Label the container with the date. These bars can last up to three months in the freezer. When you want to serve them, thaw in the fridge overnight.
Shelf Life Tips
When stored properly, Strawberry Lemonade Bars stay fresh in the fridge for about a week. Keep an eye on them for any signs of spoilage. If they look or smell off, it's best to discard them. Enjoy them chilled for a refreshing treat on warm days.
FAQs
How can I make these bars without eggs?
You can replace eggs with flaxseed meal. Mix 1 tablespoon of flaxseed meal with 2.5 tablespoons of water. Let it sit for 5 minutes to thicken. This mix acts as a good binder. You can also use applesauce. Use 1/4 cup of unsweetened applesauce for each egg. Both options keep the texture light and moist.
Can I use frozen strawberries instead of fresh?
Yes, you can use frozen strawberries. Thaw them and drain excess water before puréeing. This step is key to avoid watery bars. Frozen strawberries may change the texture a bit. However, the flavors will still taste great. You’ll enjoy that nice sweet and tangy combo.
What are the best ways to serve Strawberry Lemonade Bars?
Serve these bars chilled for a refreshing treat. A nice touch is to dust them with powdered sugar before serving. Add fresh strawberries on the side for extra color. Mint leaves also add a pop of green. These garnishes make the bars look fancy for guests.
How do I know when the bars are fully baked?
Check the edges of the bars. They should look set and lightly golden. The center can still jiggle a bit. This jiggle means they are soft and creamy. A toothpick inserted in the center should come out with a few moist crumbs. This indicates they are done but not overbaked.
This blog post covered how to make delicious Strawberry Lemonade Bars. We explored each ingredient, from measurements to substitutions. Then, we walked through each step, from prepping the oven to cooling and serving. I shared tips for perfect bars and easy cleanup, along with tasty variations. Finally, I explained storage methods and answered common questions.
Now, you can enjoy making your own bars with these clear steps and helpful tips. Happy baking!