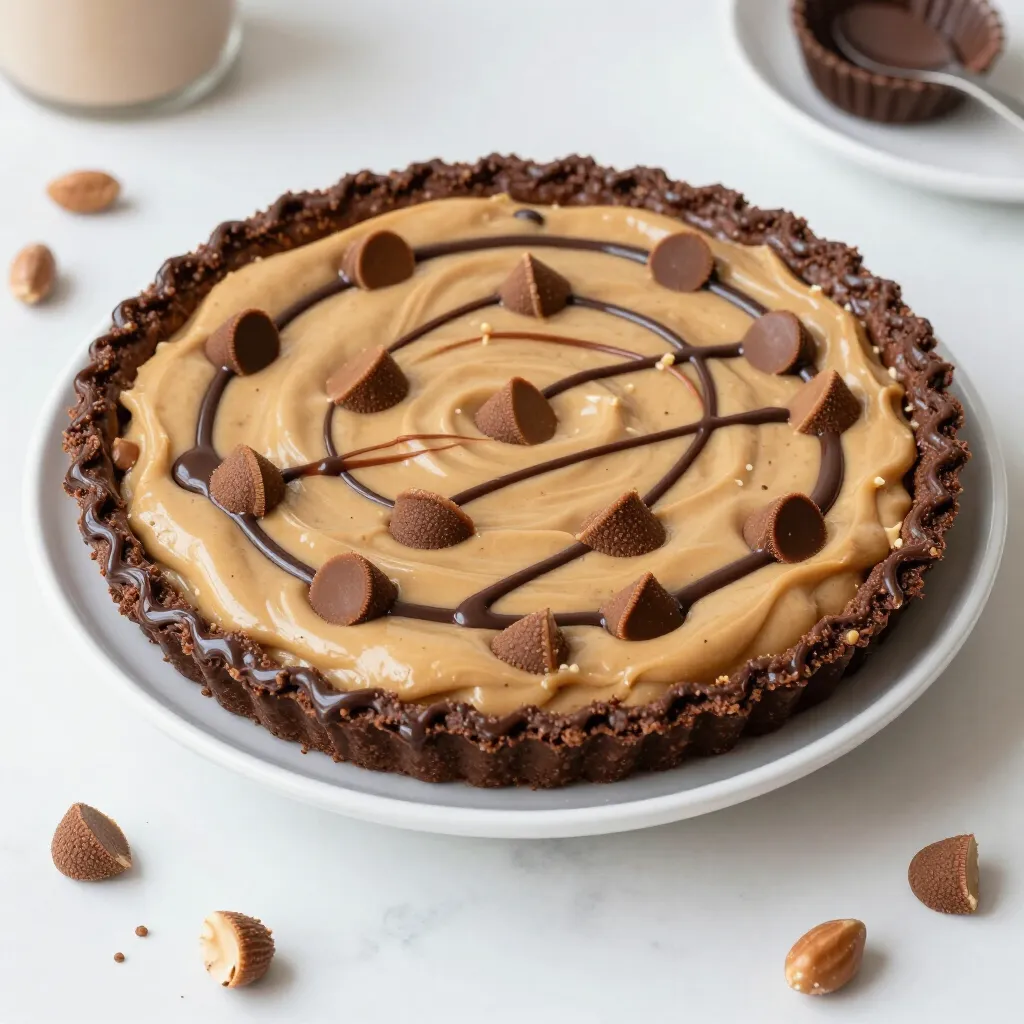
If you’re looking for a no-bake dessert that dazzles, look no further! This Peanut Butter Cup Icebox Pie combines creamy peanut butter, rich chocolate, and mini peanut butter cups into a treat you can’t resist. With simple ingredients and easy steps, you can whip it up in no time. Get ready to impress family and friends with this deliciously cool pie! Let’s dive into the recipe that will make your next gathering a hit.
Why I Love This Recipe
- Decadent Flavor: This pie combines the rich taste of chocolate with the creamy goodness of peanut butter, making every bite a blissful experience.
- No-Bake Convenience: Perfect for warm days, this icebox pie requires no baking, allowing you to whip it up quickly and keep your kitchen cool.
- Customizable Toppings: Drizzle with chocolate syrup and add extra mini peanut butter cups for a personalized touch that enhances both flavor and presentation.
- Perfect for Gatherings: With its impressive look and delicious taste, this pie is sure to be a hit at parties and family gatherings, leaving everyone asking for the recipe!
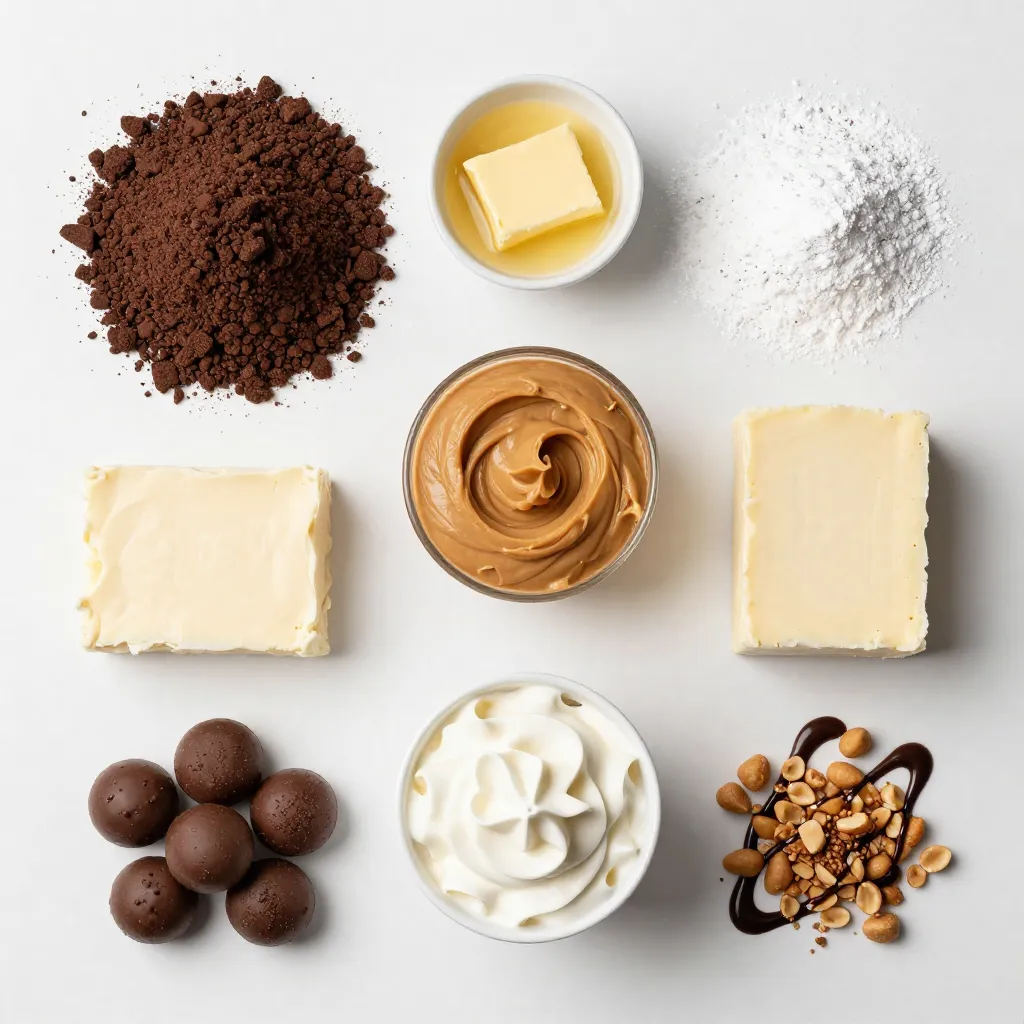
Ingredients
To make Peanut Butter Cup Icebox Pie, you need a few simple ingredients that blend together for a rich taste. Here’s what you will need:
– 1 ½ cups chocolate cookie crumbs (you can use crushed Oreos or chocolate graham crackers)
– ½ cup unsalted butter, melted
– 1 cup creamy peanut butter (smooth works best)
– 1 cup powdered sugar
– 1 (8 oz) package cream cheese, softened to room temperature
– 1 teaspoon vanilla extract
– 1 cup heavy whipping cream
– 1 cup mini peanut butter cups, chopped (plus extra for garnish)
– Chocolate syrup for drizzling on top
These ingredients come together to create a dessert that is both easy to make and delicious. The chocolate cookie crumbs form a crunchy base, while the creamy filling has a smooth texture. The mini peanut butter cups add delightful bursts of flavor. You can find all these items at your local grocery store. Enjoy making this tasty treat!
Step-by-Step Instructions
Prepare the Crust
To start, grab a medium bowl. Combine 1 ½ cups of chocolate cookie crumbs with ½ cup of melted butter. Stir until the mixture looks like wet sand. Next, take a 9-inch pie pan. Press the crumb mixture into the bottom and up the sides. Make sure it is even. Once done, place the crust in the fridge. Chill for about 30 minutes so it sets well.
Make the Filling
Now, let’s make the filling. In a large bowl, beat together 1 cup of creamy peanut butter, 1 cup of powdered sugar, 1 package of softened cream cheese, and 1 teaspoon of vanilla extract. Use an electric mixer for this part. Mix until you have a smooth texture with no lumps. This step is key for a creamy pie.
Whip the Cream
In a clean bowl, whip 1 cup of heavy cream until you see stiff peaks. This takes about 3 to 5 minutes on high speed. Once it’s whipped, gently fold the cream into the peanut butter mixture. Use a spatula and be careful not to deflate the whipped cream. You want to keep it light and airy.
Incorporate the Mini Peanut Butter Cups
Now, add in 1 cup of chopped mini peanut butter cups. Fold them into the filling carefully. This adds little bursts of flavor and texture throughout the pie. Make sure they are evenly mixed in for the best bites.
Assemble the Pie
Retrieve the chilled crust from the fridge. Pour the creamy peanut butter filling into the crust. Use a spatula to spread it evenly. Smooth out the top for a nice finish.
Chill the Pie
Cover the pie with plastic wrap or aluminum foil. Return it to the fridge. Chill for at least 4 hours, or better yet, overnight. This helps the flavors mix and the pie to set.
Tips & Tricks
Achieving the Perfect Crust
To make a great crust, start with the right cookies. I recommend using chocolate Oreo cookies or chocolate graham crackers. Both options add a rich taste. Crush them fine for a better texture. Mix the crumbs with melted unsalted butter until it looks like wet sand. Press this mixture firmly into your pie pan. This creates a solid base that holds the filling well. Chill the crust in the fridge for 30 minutes. Chilling helps it set and makes slicing easier.
Ensuring Smooth Filling
A smooth filling is key to a tasty pie. Start with room-temperature cream cheese. This helps it blend easily. In a bowl, mix creamy peanut butter with powdered sugar and vanilla extract. Use an electric mixer on medium speed. Beat until there are no lumps. Mix until the filling is creamy and smooth. This step is crucial for a delightful texture.
Whipping Cream to the Right Consistency
Whipping cream adds lightness to the pie. Use heavy whipping cream for best results. Start with a clean mixing bowl. Beat the cream on high speed until stiff peaks form. This takes about 3 to 5 minutes. Be careful not to overmix. Overmixing can turn the cream grainy. Once whipped, gently fold it into the peanut butter mixture. Use a spatula and be soft. This keeps the whipped cream airy and fluffy.
Pro Tips
- Chill Your Ingredients: For the best texture, ensure your cream cheese and heavy cream are at room temperature before mixing. This helps create a smoother filling.
- Use a Mixer: An electric mixer works best for beating the peanut butter mixture, ensuring it is fluffy and free of lumps. This will give your pie a light texture.
- Garnish Wisely: When garnishing with mini peanut butter cups, consider cutting them in half for an appealing presentation. It also allows for more chocolatey goodness in each slice!
- Overnight Chill: For optimal flavor and texture, allow your pie to chill overnight. This extra time lets the flavors meld together beautifully.
Variations
Different Flavors
You can mix things up by using flavored cream cheese. Try chocolate or strawberry cream cheese for a twist. You can also switch out the peanut butter for other nut butters. Almond or cashew butter works great too. Each option will give your pie a unique taste.
Crust Alternatives
If you need a gluten-free option, use gluten-free chocolate cookie crumbs. You can also make a healthier crust with crushed nuts or oats. Just mix these with a little coconut oil instead of butter. This change keeps your pie tasty while offering a healthier choice.
Toppings and Garnishes
Presentation matters! Top your pie with whipped cream and extra mini peanut butter cups. You can also sprinkle some crushed nuts for added crunch. Drizzling caramel or melted chocolate on top makes it look fancy. These simple touches will wow your guests and make the pie even more delicious.
Storage Info
How to Store the Pie
To keep your Peanut Butter Cup Icebox Pie fresh, chill it well. After making it, cover the pie with plastic wrap or aluminum foil. This prevents the pie from absorbing other smells in the fridge. Store it in the fridge until you are ready to serve.
Shelf Life and Freezing
The pie stays fresh in the fridge for up to five days. If you want to freeze it, wrap it tightly. It can last in the freezer for about three months. Just remember to thaw it in the fridge for a few hours before serving.
Reheating Instructions
This pie is best served cold, so no need to reheat. If you have leftovers, slice them and serve straight from the fridge. Drizzle more chocolate syrup on top for an extra treat. Enjoy the creamy, peanut buttery goodness!
FAQs
Can I use crunchy peanut butter instead of creamy?
Yes, you can use crunchy peanut butter. It will add texture to the pie. The flavor remains rich and delicious, just like creamy peanut butter.
How do I know when the pie is set?
The pie is set when it feels firm to the touch. You can also check by gently shaking it. If it jiggles only slightly, it’s ready to serve.
Can I make this pie ahead of time?
Absolutely! This pie is great to make a day ahead. It will taste even better as the flavors blend. Just make sure to cover it well in the fridge.
What can I substitute for heavy cream?
You can use coconut cream or whipped topping. Both will give you a nice texture. If you choose coconut cream, it adds a subtle flavor twist, too.
Do I need to use mini peanut butter cups, or can I use regular ones?
You can use regular peanut butter cups if that’s what you have. Just chop them into smaller pieces. They will work well in the pie and taste just as good!
This pie combines chocolate cookie crumbs, creamy peanut butter, and whipped cream for a treat that’s hard to resist. You learned how to create the crust, make the filling, and assemble it all. Remember to chill the pie for the best texture. Feel free to try different nut butters or crust options to make it your own. With the right storage, this dessert stays fresh and delicious for days. Enjoy making this simple pie and share it with friends and famil