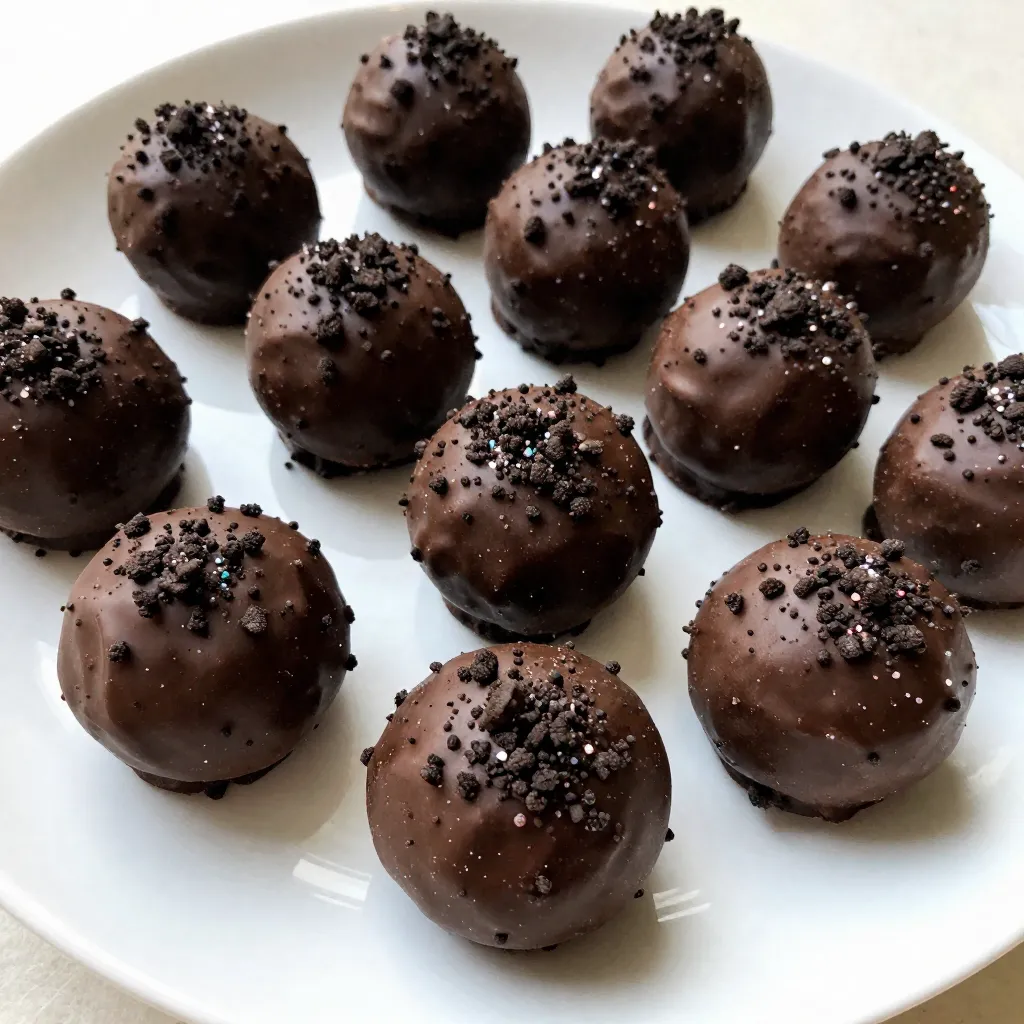
Craving something sweet and simple? You’re in the right place! No-bake Oreo truffle balls are easy to make and taste amazing. With just a few ingredients, you can whip up this delightful treat in no time. Whether you’re hosting a party or enjoying a quiet night in, these truffles will impress everyone. Let’s dive into how you can create your own chocolate-covered wonders without turning on the oven!
Why I Love This Recipe
- Easy to Make: With just a few simple ingredients and straightforward steps, these truffles are quick to whip up, making them perfect for any occasion.
- Decadent Flavor: The combination of rich cream cheese and chocolate-coated Oreos creates a delightful dessert that satisfies any sweet tooth.
- Versatile Toppings: You can customize these truffles with various toppings like sprinkles or edible glitter, adding a personal touch to your treats.
- Perfect for Sharing: With 24 truffles in a batch, they’re ideal for parties, gatherings, or simply sharing with friends and family.
Ingredients
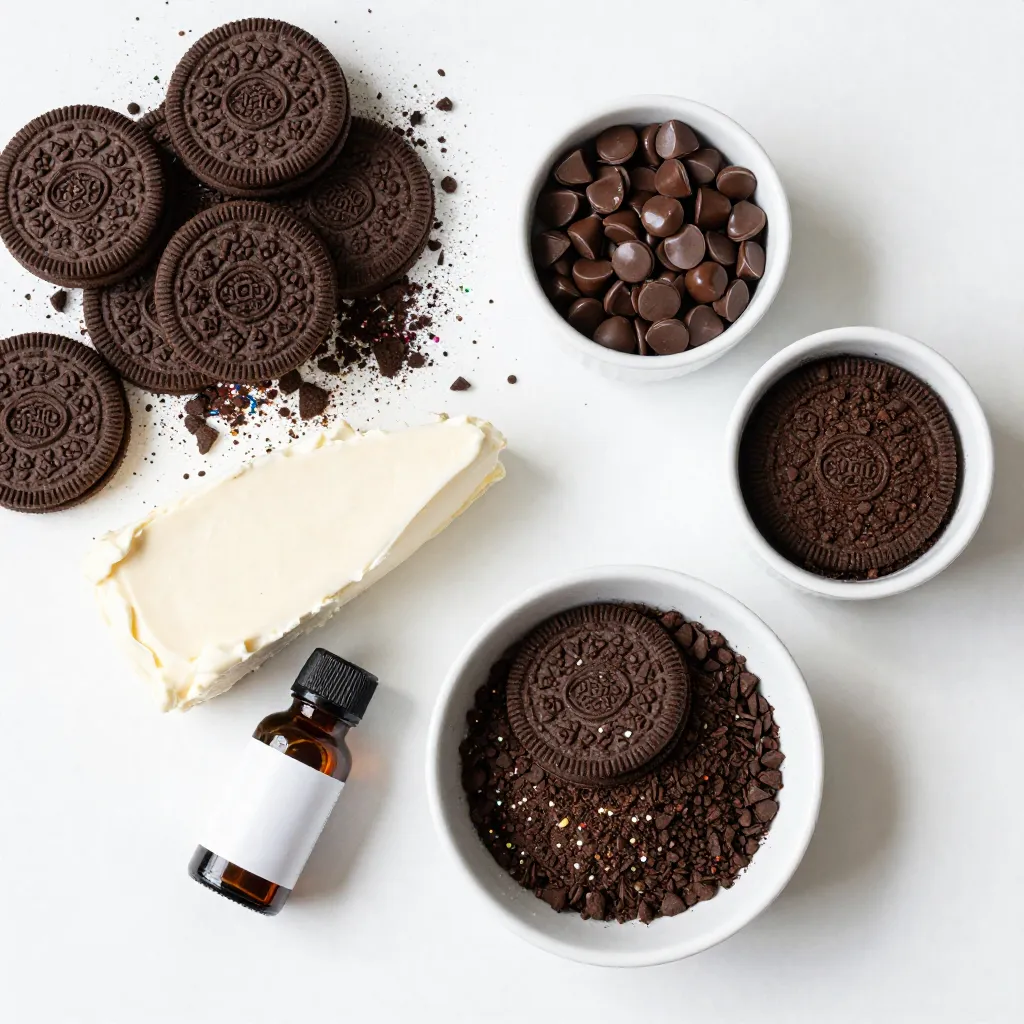
Required Ingredients
– 1 package (15.35 oz) of Oreo cookies, finely crushed
– 1 package (8 oz) cream cheese, softened
– 1 cup chocolate chips (milk or dark chocolate)
– 1 teaspoon pure vanilla extract
– ½ cup additional crushed Oreos for coating
Optional Ingredients
– Colorful sprinkles for a fun touch
– Edible glitter for extra sparkle
These ingredients make the No-Bake Oreo Truffle Balls simple and tasty. You can use crushed Oreos for the coating. This adds texture and flavor. For decoration, colorful sprinkles or glitter can elevate the look. These options allow you to personalize your treats. Enjoy mixing and matching these ingredients!
Step-by-Step Instructions
Create the Mixture
First, grab a large bowl. Crush one package of Oreo cookies until they are fine crumbs. Add the softened cream cheese to the crumbs. Use your hands or a spatula to mix them well. Aim for a dough-like texture. This step should take a few minutes. Ensure every crumb blends with the cream cheese.
Flavoring
Next, add one teaspoon of pure vanilla extract. Stir the mixture again until the vanilla is fully mixed in. This small step makes a big difference in taste. It adds a warm, sweet flavor to your truffles.
Shape the Truffles
Now, take small portions of the mixture and roll them into balls. Aim for about one inch in diameter for each ball. Place these on a parchment-lined baking sheet. This will stop them from sticking. Make sure they all look nice and round.
Chill the Truffles
Time to chill! Put the baking sheet in the freezer for 20 to 30 minutes. This helps the truffles firm up. Chilling makes it much easier to dip them in chocolate later.
Melt the Chocolate
While the truffles chill, melt your chocolate chips. Use a microwave-safe bowl for this. Heat the chocolate in 30-second bursts. Stir after each interval until it’s smooth. Be careful not to burn the chocolate; keep a close eye on it.
Coat and Decorate
Now for the fun part! Dip each chilled truffle into the melted chocolate. Make sure each ball gets fully coated. Use a fork to lift them out. Let any extra chocolate drip off before placing them back on the baking sheet.
Set the Truffles
After coating, roll the truffles in crushed Oreos for decoration. If you want, sprinkle some colorful sprinkles or edible glitter on top. Do this while the chocolate is still wet. Then, place them back in the fridge to set for about 30 minutes.
Serve and Enjoy
Once the chocolate is set, your truffles are ready to serve. You can enjoy them cold or at room temperature. These Oreo Delight Truffle Balls are a perfect treat for any occasion!
Tips & Tricks
Best Practices for Mixing
To get that perfect dough-like consistency, start with finely crushed Oreos. This makes mixing easy. Use softened cream cheese for the best blend. I like to mix with my hands. It helps me feel the texture. The goal is a smooth blend. You should not see any dry crumbs. If the mix feels too dry, add a bit more cream cheese.
Chocolate Melting Techniques
Melting chocolate can be tricky. Use a microwave-safe bowl for this. Heat the chocolate chips in 30-second bursts. After each burst, stir the chocolate. This helps it melt evenly. If you see any lumps, keep stirring. Stop when the chocolate is smooth. Be careful not to burn it. Burnt chocolate is hard to fix.
Storing the Truffles
To keep your truffles fresh, store them in an airtight container. Use parchment paper to separate layers. This prevents sticking. You can keep them in the fridge for a week. If you want them to last longer, freeze them. Just make sure they are in a freezer-safe container. When you’re ready to enjoy them, let them thaw in the fridge.
Pro Tips
- Chill the Mixture: Ensure your mixture is well chilled before rolling it into balls. This makes shaping easier and ensures they hold their form during dipping.
- Use Quality Chocolate: Opt for high-quality chocolate chips for coating; it will enhance the flavor and texture of your truffles.
- Experiment with Coatings: Feel free to experiment with different coatings such as crushed nuts, coconut flakes, or even different types of cookies for a twist on the classic Oreo flavor.
- Storage Tips: Store your truffles in an airtight container in the refrigerator to keep them fresh for up to a week.
Variations
Flavor Variations
You can mix it up with different flavors! Swap the Oreo cookies for other types of cookies. Try using peanut butter cookies or mint cookies. For the cream cheese, you could use flavored cream cheese. Think about using strawberry or lemon cream cheese for a fruity twist. This way, you get new tastes each time you make them.
Vegan or Dairy-Free Options
Want a vegan version? It’s easy! Use vegan cream cheese instead of regular cream cheese. For the chocolate, pick dairy-free chocolate chips. There are many brands that offer great dairy-free options. Make sure to check the labels. You can still enjoy these treats without dairy!
Seasonal Toppings
Decorate your truffles to match the season! Use holiday sprinkles for Christmas or orange sprinkles for Halloween. You could even add edible glitter for a fun touch at parties. Get creative with colors to make them look festive and fun. The right toppings can make your truffles shine!
Storage Info
Best Storage Practices
To keep your Oreo truffle balls fresh, follow these tips:
– Use an airtight container: This prevents air from drying out the truffles.
– Store in the fridge: The cool temperature helps the truffles maintain their shape and flavor.
– Separate layers: If stacking, place parchment paper between layers to avoid sticking.
– Avoid sunlight: Keep them in a dark place to prevent melting or spoilage.
Freezing Instructions
You can freeze your Oreo truffle balls for longer storage. Here’s how:
1. Prepare for freezing: Place the truffles in a single layer on a baking sheet.
2. Freeze until firm: Leave them in the freezer for about 1 hour.
3. Transfer to a container: Once firm, place the truffles in an airtight container or freezer bag.
4. Label and date: It helps to know when you made them.
5. Thawing: When ready to eat, let them thaw in the fridge for a few hours. Enjoy them chilled!
FAQs
How do you make No-Bake Oreo Truffle Balls?
To make No-Bake Oreo Truffle Balls, follow these steps:
1. Mix Cookies and Cream Cheese: Combine crushed Oreo cookies and softened cream cheese in a bowl. Mix until smooth.
2. Add Flavor: Stir in vanilla extract for extra taste.
3. Shape the Balls: Roll the mixture into small balls, about 1 inch wide. Place them on a lined baking sheet.
4. Chill: Freeze the truffle balls for 20-30 minutes until firm.
5. Melt Chocolate: Melt chocolate chips in the microwave. Stir until smooth.
6. Coat the Truffles: Dip chilled balls into chocolate. Use a fork to lift them out.
7. Decorate: Roll in crushed Oreos or add sprinkles.
8. Set: Chill again until the chocolate hardens.
This process makes tasty truffles that are easy to enjoy!
Can I use different types of chocolate for coating?
Yes, you can use different chocolates! Here are some options:
– Milk Chocolate: Sweet and creamy, great for kids.
– Dark Chocolate: Rich and bold, perfect for adults.
– White Chocolate: Sweet and smooth, adds a nice contrast.
– Colorful Candy Melts: Fun for parties, makes bright truffles.
Feel free to mix and match based on your taste!
How long do No-Bake Oreo Truffle Balls last?
No-Bake Oreo Truffle Balls last about 1 week in the fridge. Make sure to store them in an airtight container. If you freeze them, they can last up to 3 months. Just thaw them in the fridge before serving.
Are there any nut-free alternatives for this recipe?
Yes, this recipe is nut-free! Use regular Oreo cookies and cream cheese. If you want to avoid cross-contamination, check the labels. You can also use dairy-free cream cheese for a vegan option. Enjoy worry-free!
You now know how to make delicious No-Bake Oreo Truffle Balls. We covered all the key steps, from mixing the Oreo cookies with cream cheese to decorating your truffles. The optional ingredients allow for your own creative touch. Remember to chill the truffles well and use proper melting techniques to get the best chocolate coating. With a few tips, your truffles will stay fresh. Enjoy making these treats for any occasion and share them with others. Happy creatin