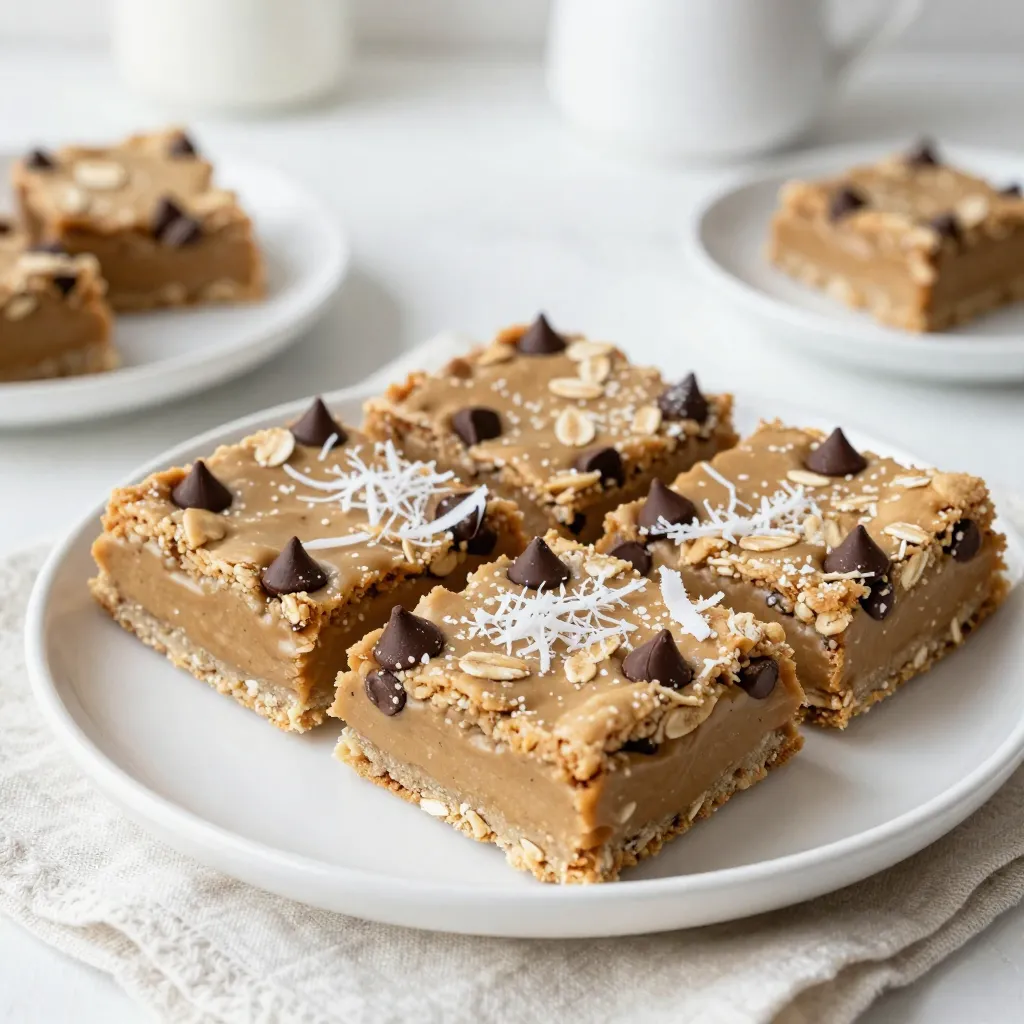
Ready for a deliciously simple treat? These No-Bake Cookie Butter Bars are easy to make and taste amazing. With just a few key ingredients, you can whip up a batch in no time. Imagine the rich flavor of cookie butter combined with chocolate chips and a hint of coconut. This recipe is perfect for kids and adults alike. Let’s dive into the fun of making these tasty bites!
Why I Love This Recipe
- Quick and Easy: This no-bake recipe can be made in just 10 minutes, making it a perfect last-minute treat!
- Deliciously Indulgent: The combination of cookie butter and chocolate creates a rich and satisfying flavor that everyone loves.
- Healthy Ingredients: With oats, almond flour, and coconut, these bars are a nutritious snack option that doesn’t compromise on taste.
- Customizable: You can easily add your favorite mix-ins like nuts or colorful sprinkles, making each batch unique!
Ingredients
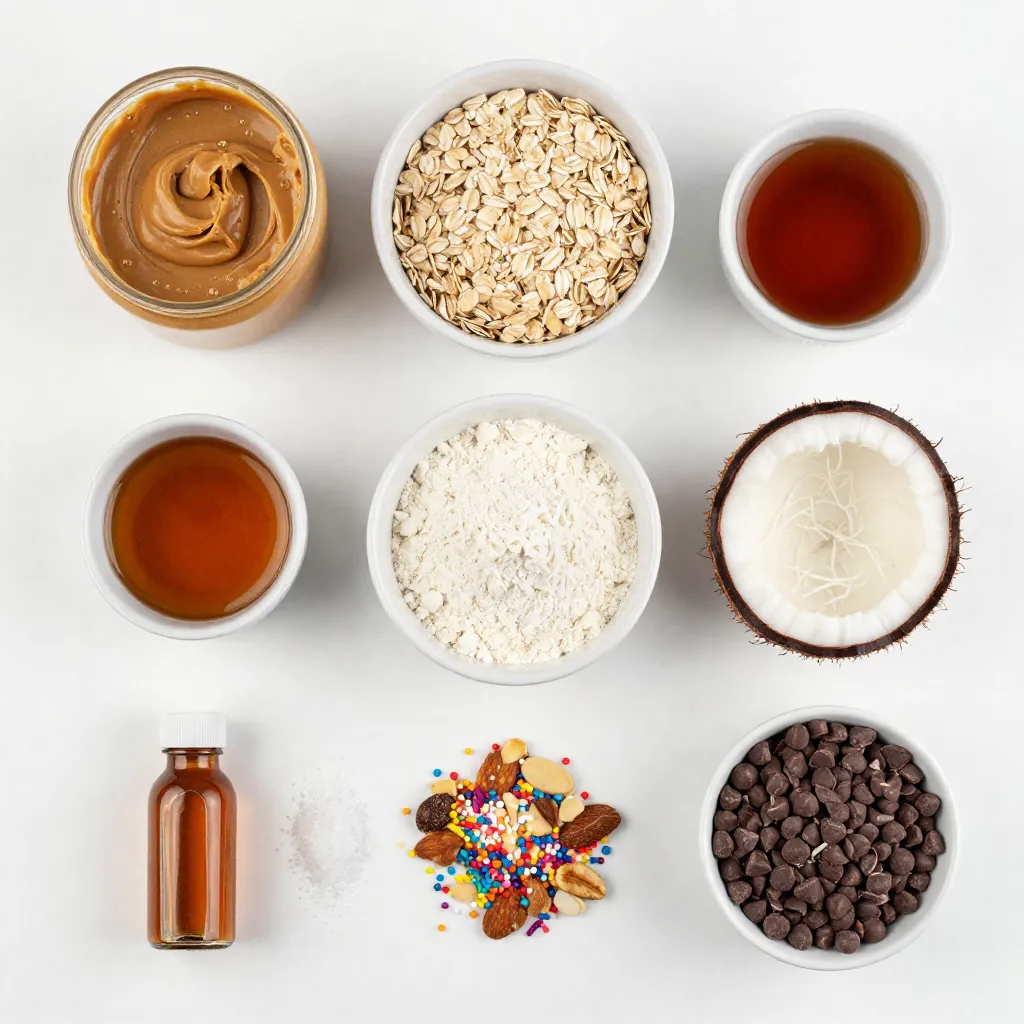
Key Ingredients List
– 1 cup creamy cookie butter
– 1 cup rolled oats
– 1/2 cup almond flour
– 1/4 cup pure maple syrup
– 1/4 cup unsweetened shredded coconut
– 1/2 teaspoon pure vanilla extract
– 1/4 teaspoon sea salt
– 1/2 cup chocolate chips
– Optional toppings: crushed nuts, colorful sprinkles
The main star of this recipe is the creamy cookie butter. It brings a sweet and rich flavor that you won’t forget. The rolled oats add a nice texture and help hold everything together. Almond flour makes the bars soft and gives them a nutty taste.
Maple syrup sweetens the bars naturally. It also helps with the stickiness of the mixture. Unsweetened shredded coconut adds a fun chew and a hint of coconut flavor. The vanilla extract enhances all the other flavors, making everything taste even better.
Sea salt is key! It balances the sweetness and brings out the flavors. Chocolate chips are the final touch. They add delicious pockets of chocolate in every bite.
If you’re feeling creative, you can add toppings like crushed nuts or colorful sprinkles. These extras make the bars look even more fun and tasty!
Step-by-Step Instructions
Preparation of Mixture
First, grab a large mixing bowl. Scoop in 1 cup of creamy cookie butter, 1/4 cup of pure maple syrup, and 1/2 teaspoon of vanilla extract. Use a spatula to mix well until the blend is smooth. Next, slowly add 1 cup of rolled oats, 1/2 cup of almond flour, 1/4 cup of shredded coconut, and 1/4 teaspoon of sea salt. Mix these in until everything is well combined. The mixture should feel thick and slightly sticky.
Assembling the Bars
Now, fold in 1/2 cup of chocolate chips. Remember to save a few chips for topping later. Take an 8-inch square baking dish and line it with parchment paper. Leave some paper hanging over the sides for easy removal. Spoon the mixture into the dish and press it down with your hands or a spatula. Make sure it spreads evenly. If you saved some chocolate chips, sprinkle them on top and gently press them in.
Chilling and Serving
Pop the dish into the fridge for at least 2 hours. This helps the bars set well. Once they are firm, lift them out using the parchment paper. Use a sharp knife to cut them into squares. You can serve them cold or at room temperature for a sweet treat. Enjoy!
Tips & Tricks
Achieving the Perfect Texture
To get the right texture, your mixture needs to be thick and sticky. This helps the bars hold together well. After mixing, press the mixture firmly into the baking dish. Next, chill the bars for at least two hours. This step is key for getting them firm and easy to cut.
Flavor Enhancements
Want to boost the flavor? You can add more chocolate or nuts. Simply fold in extra chocolate chips or your favorite nuts. You can also switch up the nut butter. Try almond or cashew butter for a different taste.
Presentation Ideas
Presenting the bars can make them even more fun. Arrange the bars on a nice platter for a special touch. For a gourmet look, drizzle melted chocolate on top. You can also add colorful sprinkles or crushed nuts for extra flair.
Pro Tips
- Chill for Best Results: Allow the cookie butter bars to chill longer than the minimum recommended time. This helps them firm up better, making them easier to cut and enjoy.
- Customize Your Mix-ins: Feel free to experiment with different mix-ins. Try adding dried fruit, seeds, or your favorite nut butter for a unique twist on the flavor and texture.
- Use Quality Ingredients: Opt for high-quality chocolate chips and organic maple syrup to enhance the overall taste of your bars, making them even more delicious.
- Perfect Portioning: When cutting the bars, use a sharp knife and clean cuts to avoid crumbling. Wipe the knife between cuts for neat edges.
Variations
Dietary-Friendly Options
You can easily make these bars vegan. Just swap the honey or maple syrup for agave. Use a nut butter that fits your needs, like almond or peanut butter. For a gluten-free treat, use certified gluten-free oats and check that your almond flour is gluten-free.
Flavor Combinations
Want to change up the flavor? Add a pinch of cinnamon or nutmeg to the mix. You can even swap chocolate chips for dried fruits like raisins or cranberries. This gives your bars a chewy bite and a touch of natural sweetness.
Alternative Sweeteners
If you want to change the sweetness, try using honey or agave instead of maple syrup. You can adjust the amount to match your taste. If you want a sweeter bar, add a bit more sweetener.
Storage Info
Best Storage Practices
To keep your no-bake cookie butter bars fresh, store them in the refrigerator. The cool air helps maintain their shape and taste. You can also freeze them for longer storage. If you choose to freeze, use airtight containers. This keeps the bars from getting freezer burn.
Shelf Life
In the fridge, the bars stay fresh for up to one week. If you freeze them, they can last for three months. Check for any signs of spoilage. If you see mold or an off smell, it’s best to throw them away.
Reheating Tips
You can enjoy these bars cold right from the fridge. If you prefer them warm, heat them slightly in the microwave. Be careful not to overheat, as they may lose their texture. If frozen, allow them to thaw in the fridge overnight before serving. This way, they return to their perfect state.
FAQs
Can I use natural peanut butter instead of cookie butter?
Yes, you can use natural peanut butter. It will change the flavor a bit, though. Cookie butter has a sweet and spiced taste, while peanut butter is more nutty. If you like the taste of peanuts, go ahead and swap it. Just keep in mind, the bars may be less sweet.
How can I make these bars more chocolatey?
To add more chocolate, mix in extra chocolate chips. You can also use cocoa powder in the mixture. Start with two tablespoons of cocoa powder and adjust to your taste. For a fun twist, drizzle melted chocolate on top before chilling.
Can I add protein powder to the mixture?
Yes, adding protein powder is a great idea! It boosts the nutrition. Start with a quarter cup of protein powder. Mix it in with the oats and almond flour. This way, you keep the bars tasty and filling.
What’s the best way to cut these bars?
To cut the bars, use a sharp knife. First, chill the bars until they are firm. Lift them out of the dish using the parchment paper. Then, place them on a cutting board. Cut them into squares or rectangles. Wipe the knife between cuts for clean edges.
Can I substitute raw oats with instant oats?
You can use instant oats, but the texture will change. Instant oats make the bars softer and less chewy. If you like a firmer bite, stick to rolled oats. If you use instant oats, it’s best to chill them longer before cutting.
You now have a simple and tasty recipe for cookie butter bars. We explored the key ingredients, step-by-step instructions, and helpful tips to make these bars perfect. Remember, you can adjust flavors to suit your taste or dietary needs. Store them properly to keep them fresh. Enjoy experimenting with variations, and share with friends! These bars make a great snack anytime. With this knowledge, you can create delicious treats easily. Now, grab your ingredients and start bakin